Legal Content
Three types of Legal Content can be created in your Konvert™ portal: General Terms of Use, DAM Terms of Use and a Privacy Policy. The General Terms of Use are shown to new users when they first login or register, and will always remain accessible from the footer on every page; the header Terms of Use is displayed above this content. The DAM Terms of Use are shown to new users when they first view the DAM; the header Terms of Use is displayed above this content. The Privacy Policy is always accessible from the footer on every page; the header Privacy Policy is displayed above this content.
In this article, we will explain:
- How to add Legal Content: General Terms of Use, DAM Terms of Use and a Privacy Policy
- How to preview Legal Content
- How to edit, unpublish or delete Legal Content
ACCESS LEGAL CONTENT SETTINGS
Your Legal Content can be created and managed through the Portal Settings page. To access the Portal Settings page, click the drop-down menu on the top-left and select the Portal Administration link (Fig. 1).

Figure 1. The Portal Administration link
From the Portal Administration page, select the Portal Settings card (Fig. 2).

From the Portal Settings page, click on the Legal Content tab (Fig. 3).

Figure 3. The Legal Content tab
ADD LEGAL CONTENT
Choose the Content Type you would like to add — General Terms of Use, DAM Terms of Use or a Privacy Policy — and click the corresponding +Add Content link in the Actions column (Fig. 4).

Figure 4. Legal Content types and +Add Content links
Type or paste your Legal Content in the Legal Content Editor (Fig. 5). Legal Content can include rich text, which allows for bulleted or numbered lists (just click on the appropriate icon above the text bar). You may also include bold, italic, underlined or linked text in the Legal Content.

Figure 5. The Legal Content Editor with no Legal Content entered
After text has been entered in the Legal Content Editor the Save and Cancel buttons will appear near the bottom (Fig. 6).

Figure 6. The Save and Cancel buttons in the Legal Content Editor, after Legal Content has been entered
To save the Legal Content and exit the Legal Content Editor, click the Save button (Fig. 7).

Figure 7. The Save button
To exit the Legal Content Editor without saving the Legal Content, click the Cancel button (Fig. 8).

Figure 8. The Cancel button
After the Save button has been clicked, the Legal Content will be saved but remain unpublished (Fig. 9).

Figure 9. Unpublished Legal Content in the Legal Content Editor
To exit the Legal Content Editor without publishing the Legal Content, click the Close Editor button (Fig. 10).

Figure 10. The Close Editor button
To publish the Legal Content so it is visible to all users, click the Publish button (Fig. 11).

Figure 11. The Publish button
After Legal Content has been entered (either as a draft or published), the links in the Actions column will change to Edit and Preview, and the Status of the Legal Content will be displayed (Fig. 12).

PREVIEW LEGAL CONTENT

The legal content will be displayed as a user would see it (Fig. 14).

To exit the preview, click the Exit Preview button near the top of your screen (Fig. 15).

EDITING, UNPUBLISHING OR DELETING LEGAL CONTENT
To edit existing Legal Content, click the corresponding Edit link (Fig. 16) in the Actions column.

Edit the Legal Content in the Legal Content Editor (Fig. 17). Legal Content can include rich text, which allows for bulleted or numbered lists (just click on the appropriate icon above the text bar). You may also include bold, italic, underlined or linked text in the Legal Content.
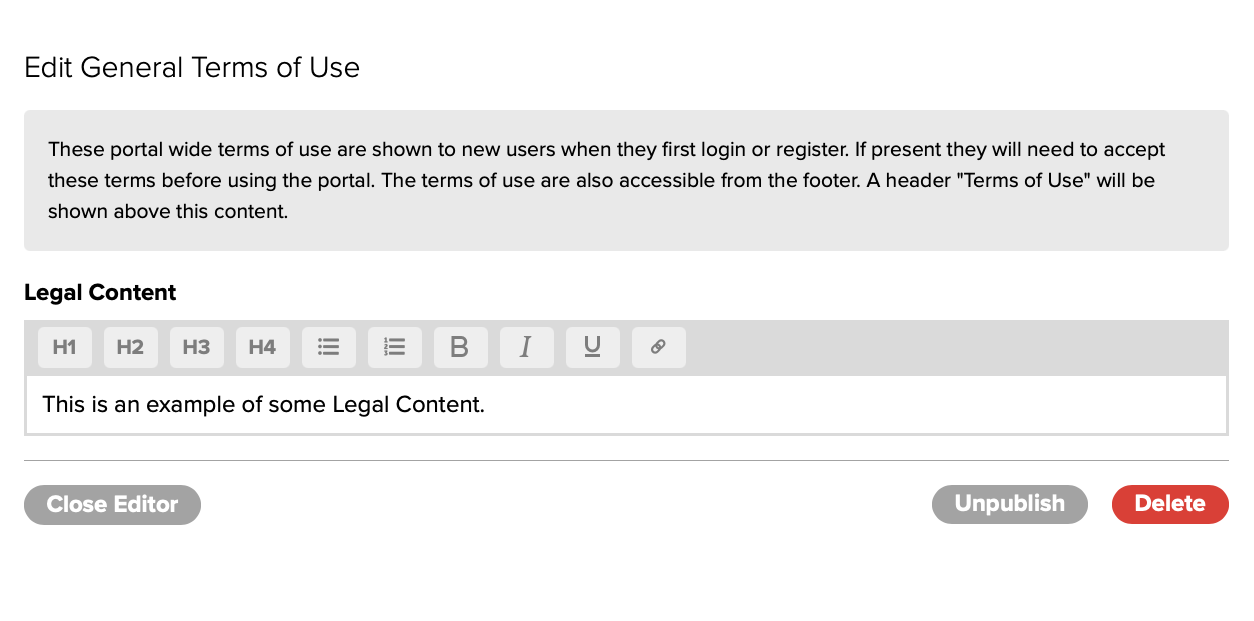
To unpublish the Legal Content so it is no longer visible to any users, click the Unpublish button (Fig. 18).

To permanently delete the Legal Content, click the Delete button (Fig. 19).
