Module Settings
When creating modules in your Konvert™ portal, there are many settings you can select from to customize the user experience.
In this article, we will explain:
- How to access the Edit Module screen
- Basic Info settings
- Access Control settings
- Certificate & CEU settings
- Scoring settings
- Advanced settings
ACCESS THE MODULE EDITOR PAGE
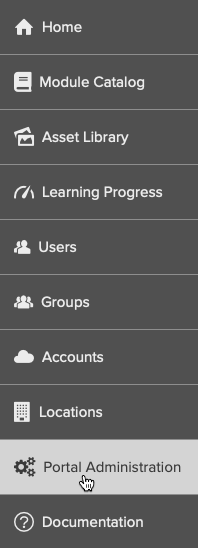
To access the Module Editor page, click the drop-down menu in the top-left corner of the page and select the Portal Administration menu option (Fig. 1).
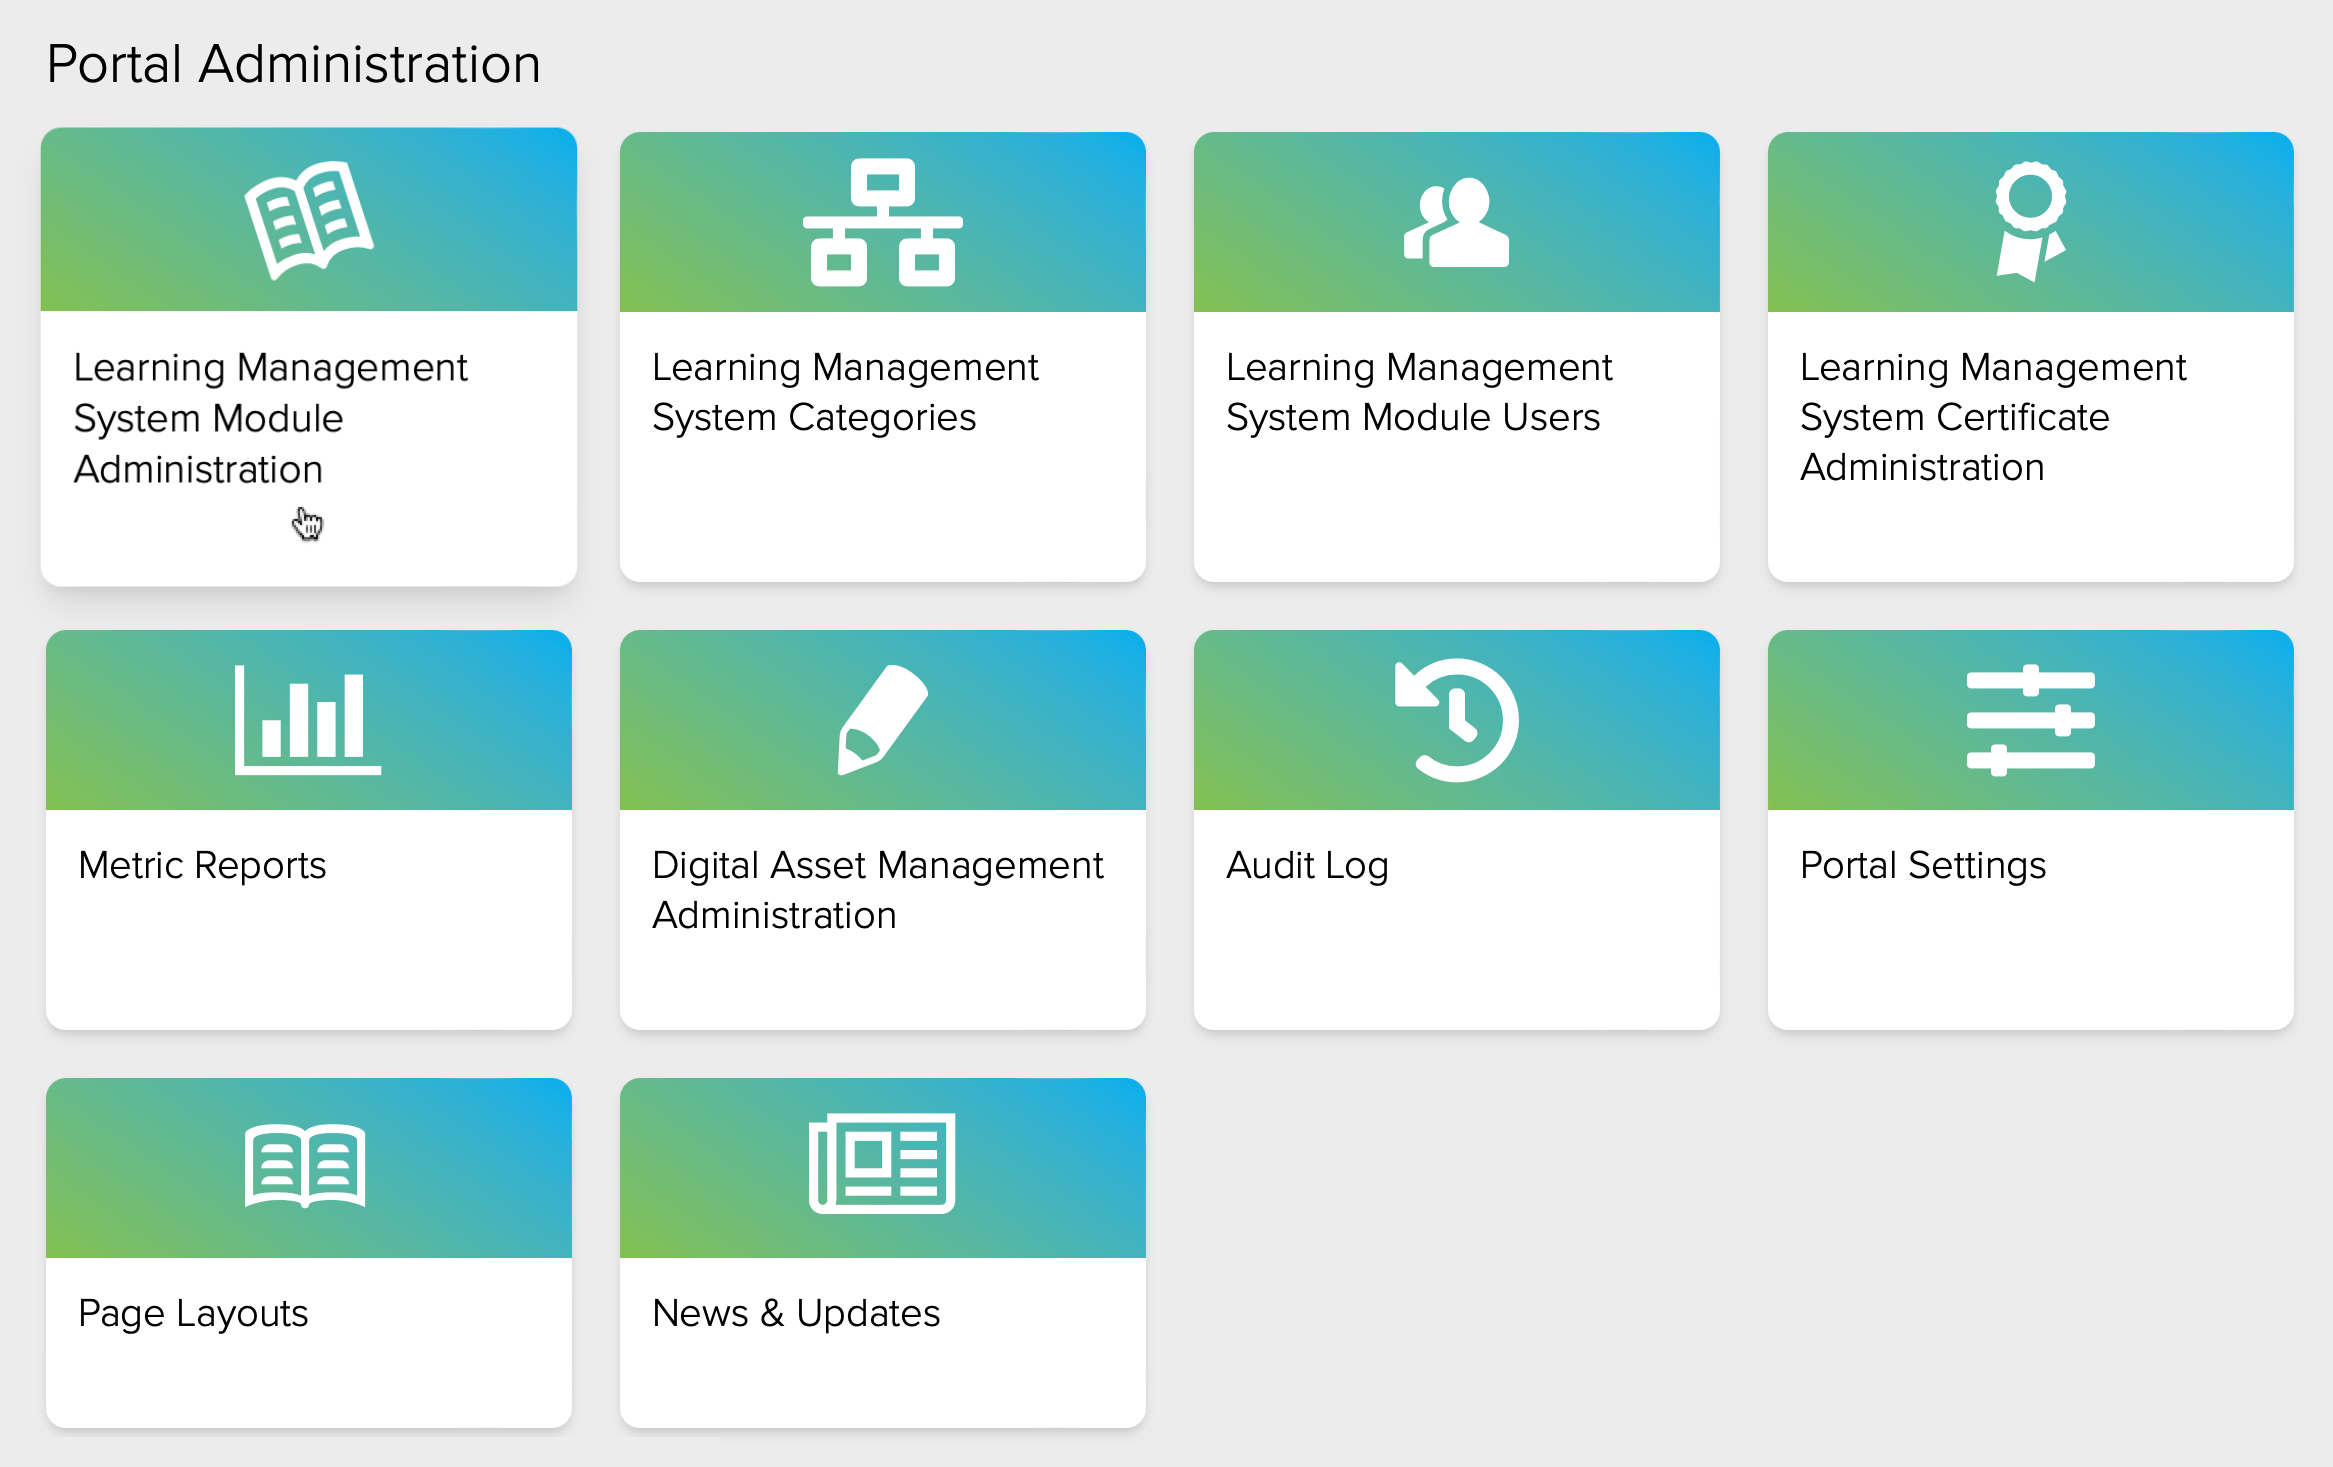
From the Portal Administration page, select the Learning Management System Module Administration card (Fig. 2).
From the Learning Management System Module Administration screen, click on the Edit Mode toggle (Fig. 3) near the top-right corner of the screen if it is not already activated (Fig. 3).
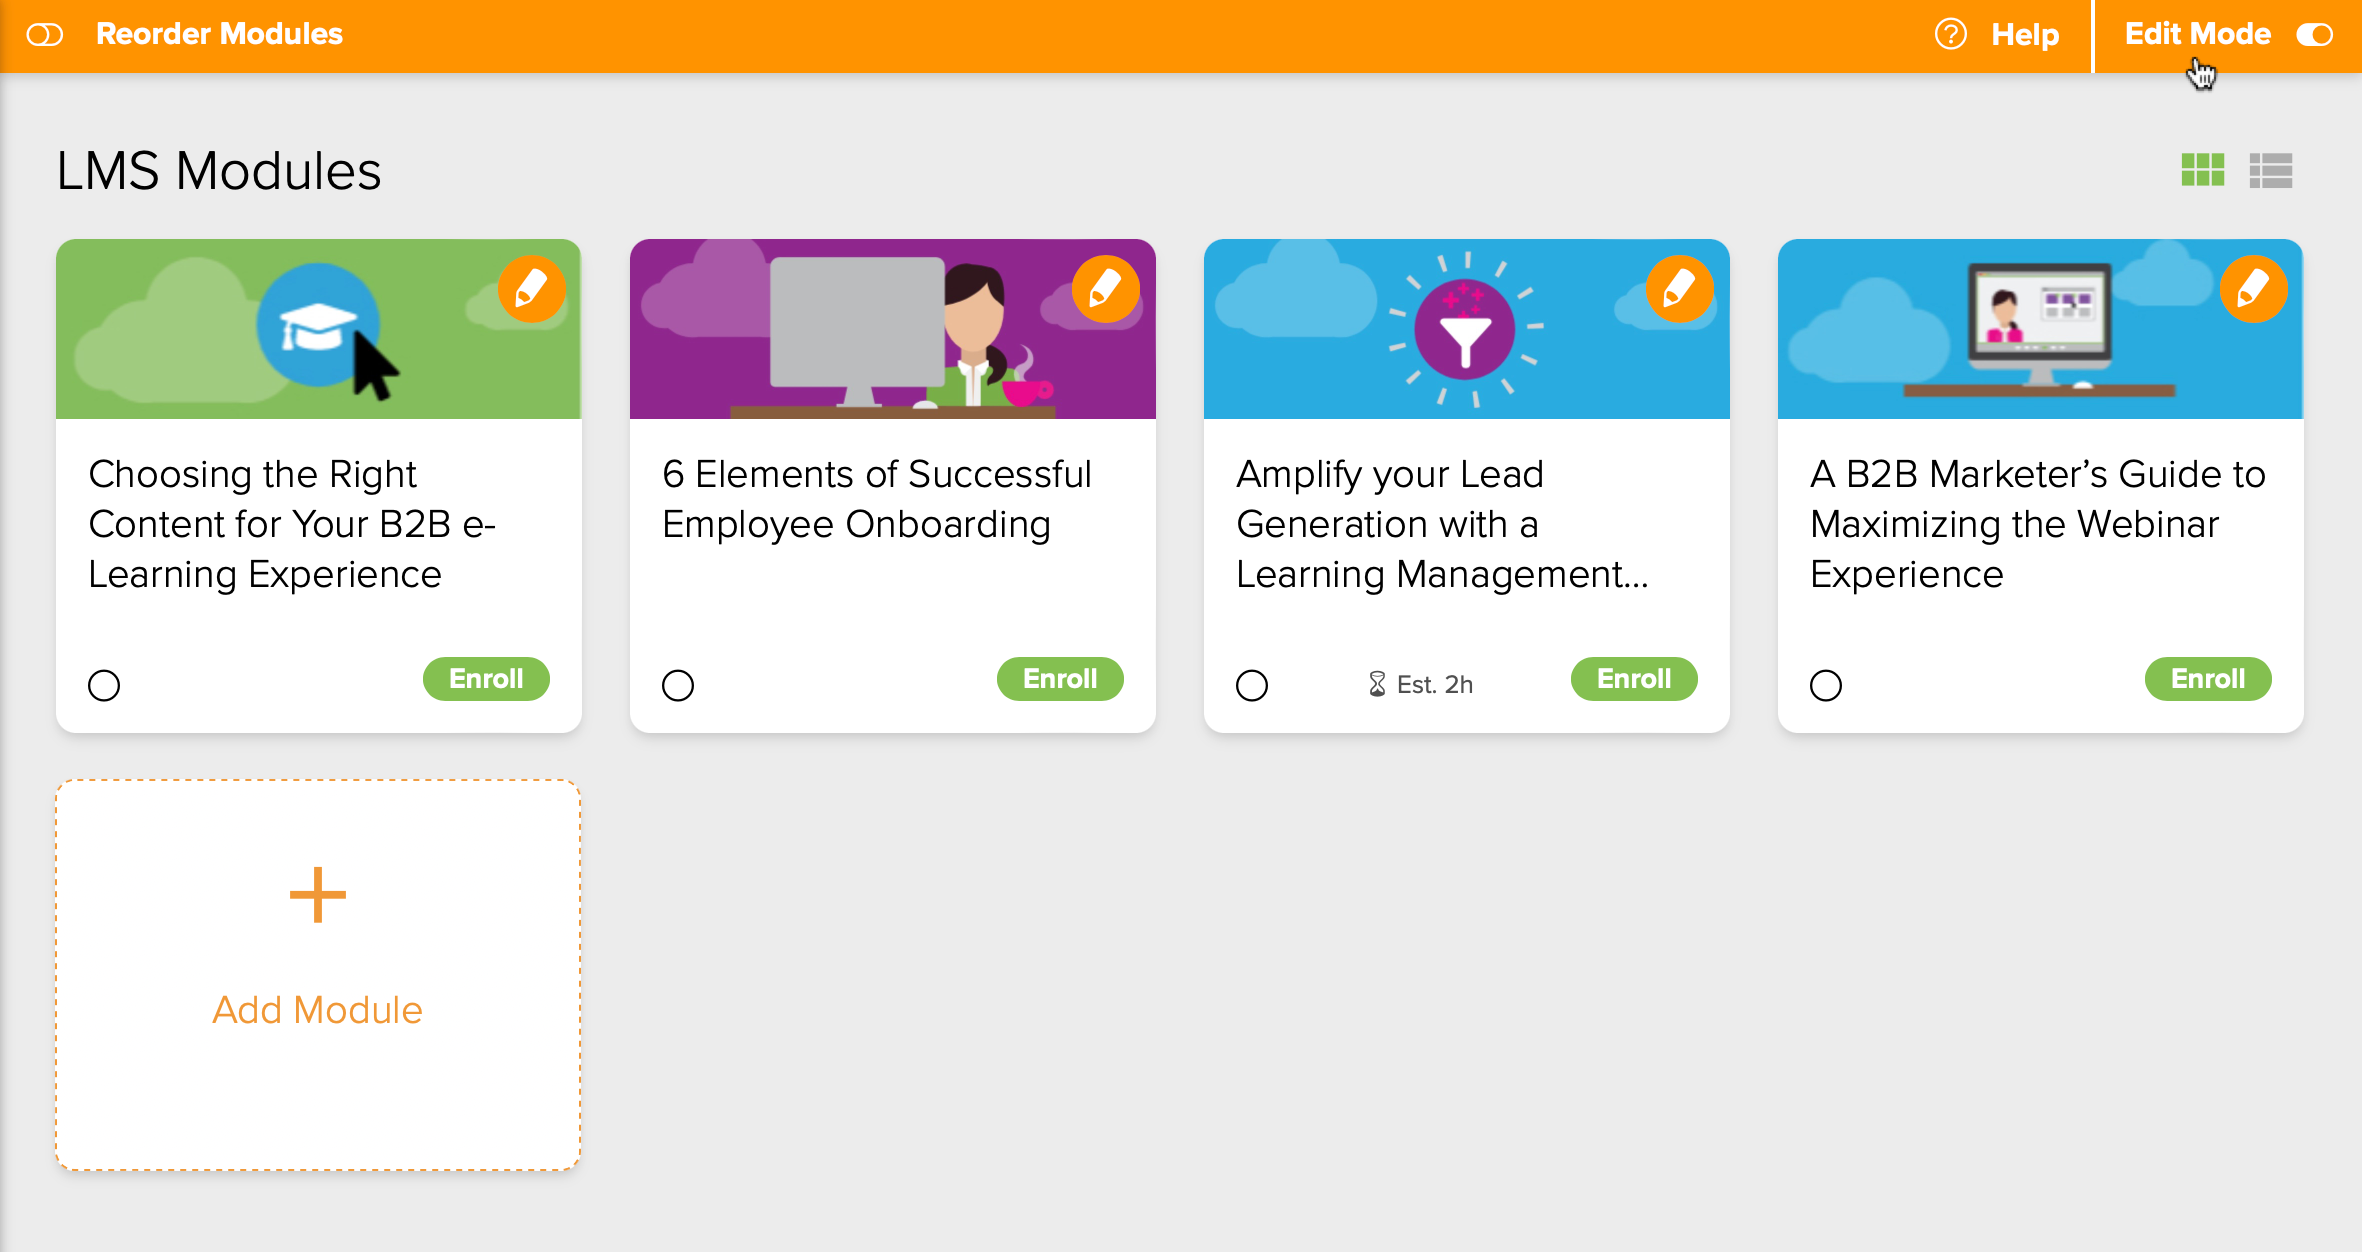
Click the Pencil Icon near the top-right corner of the Module Card you would like to edit (Fig. 3, above).
BASIC INFO SETTINGS
Click the Basic Info tab (Fig. 4) toward the left of the screen to manage the following settings.
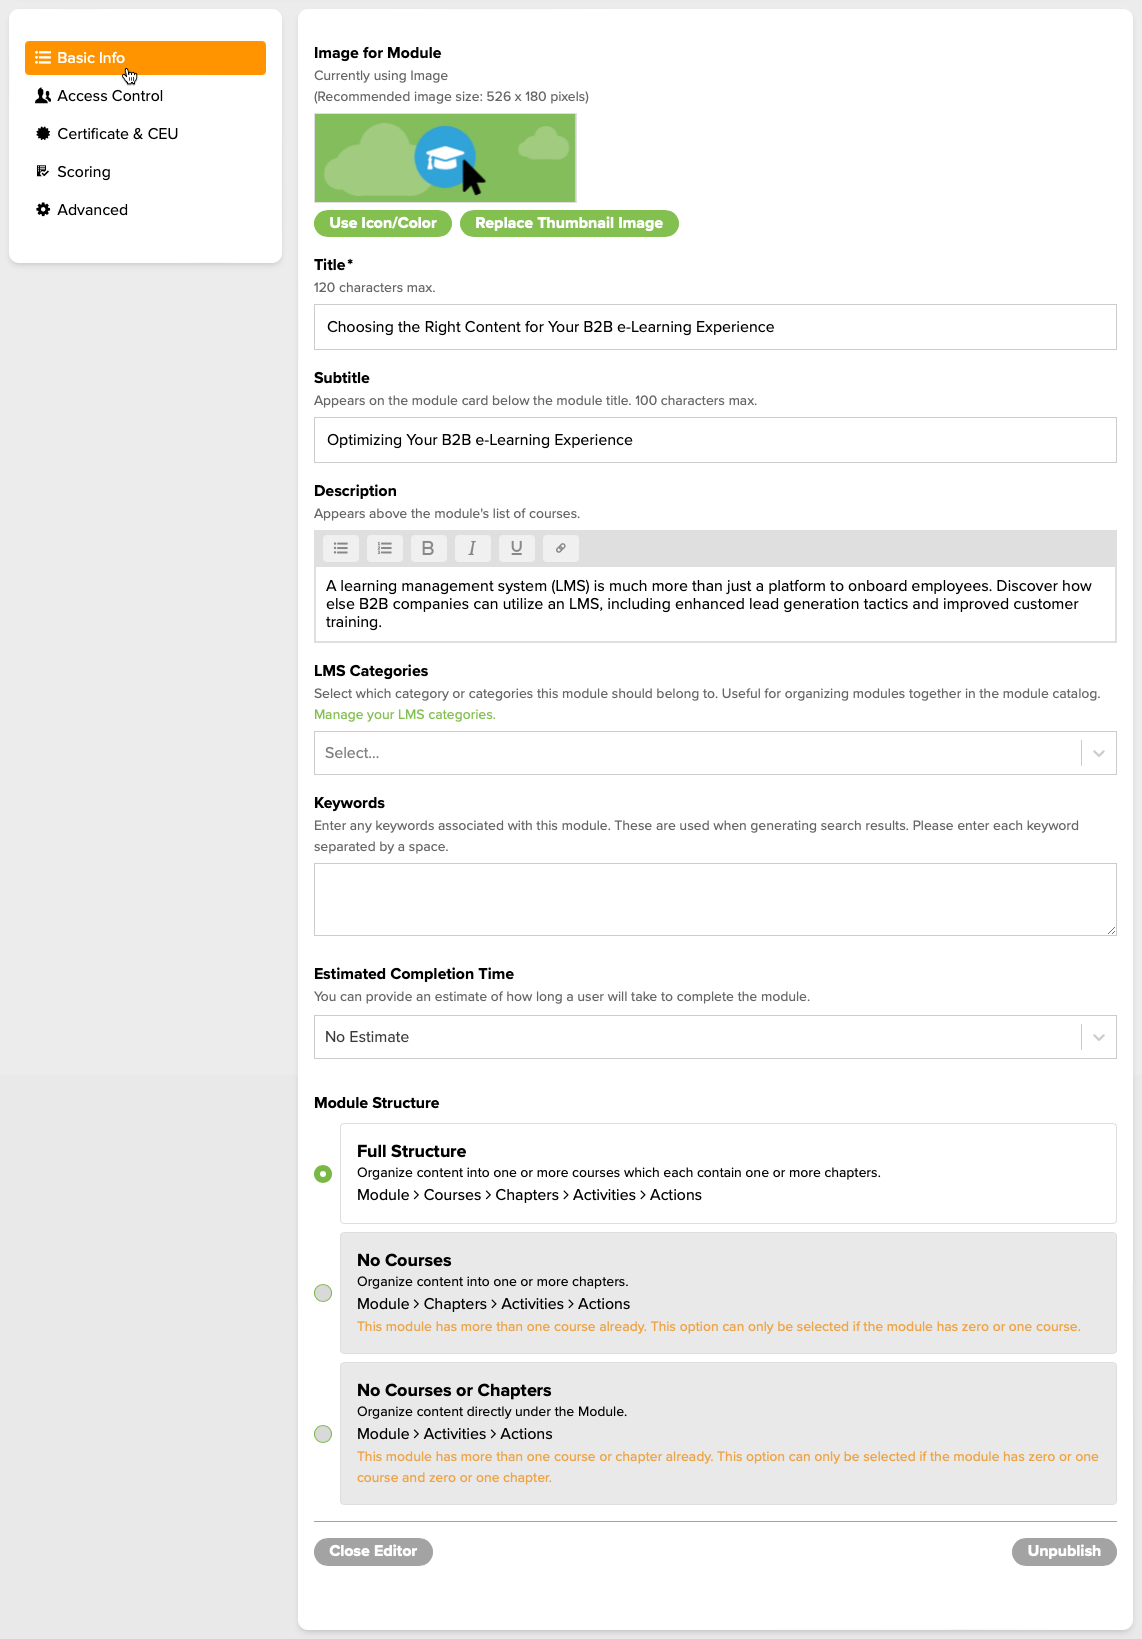
Image for Module: Upload an image or use an icon with a solid color or gradient background
- To use an icon with a solid color or gradient background, click the Use Icon/Color button. Select the background type (solid color or gradient), your color(s) and your icon. Click the Save button.
- To use an image, click the Upload Image button, then either drag and drop the image file into the space provided, or click the Add a File button and select the desired image.
- Preferred file types include JPEG and PNG
- A minimum resolution of 526 pixels by 180 pixels is recommended
- Upon uploading an image in the editor, you will be able to crop the image with the built-in cropping tool. Position your image so that it appears correctly in the provided space. When finished, click the OK button.
Title: The module title appears on the module card. There is a 120-character maximum.
Subtitle: The module subtitle appears on the module card below the module title when a user rolls over the card. There is a 100-character maximum.
Description (optional): The module description appears above the module's list of courses. The description can include rich text, which allows for bulleted or numbered lists (just click on the appropriate icon above the text bar). You may also include bold, italic, underlined or linked text in the description.
LMS Categories (optional): Categories can be created, edited and deleted on the Learning Management System Categories page. Select them here from the pop-up menu. More than one can be assigned to each module
Keywords (optional): Enter any keywords associated with this module. The keywords will help to improve the search results for users.
Estimated Completion Time (optional): You may provide an estimate of how long you think it may take a user to complete the module. Choose Days, Hours or Minutes from the pop-up
Module Structure: Konvert™ LMS modules can be structured in one of three ways.
- Full Structure: Module > Courses > Chapters > Activities & Actions
- No Courses: Module > Chapters > Activities & Actions
- No Courses or Chapters: Module > Activities & Actions
To learn more about Module Structure, see the Getting Started with Modules page.
ACCESS CONTROL SETTINGS
Click on the Access Control tab (Fig. 5) to manage and modify the following settings.
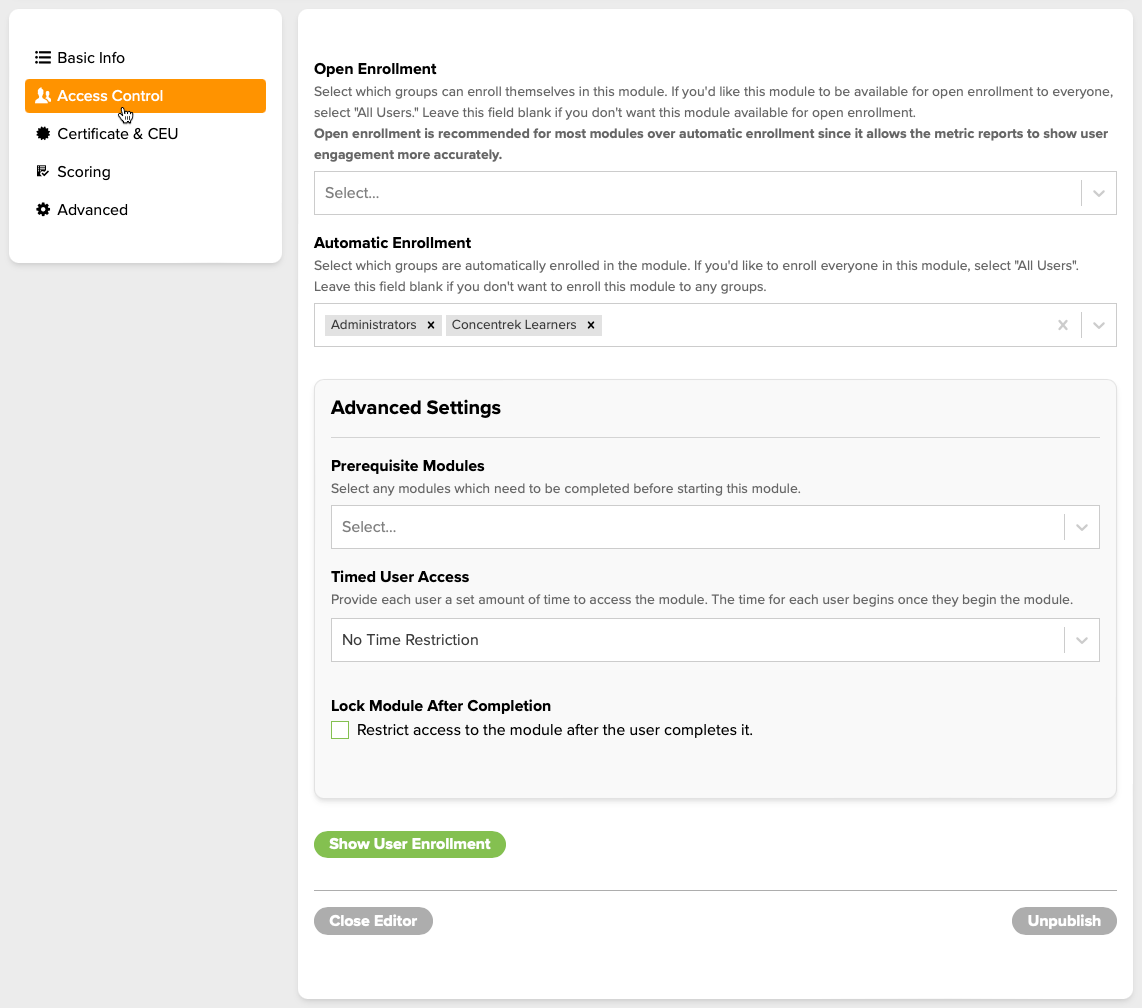
Open Enrollment: Select which groups of users can open enroll themselves in this module.
- If you'd like this module to be available to a specific Group of Users, select the preferred Group from the pop-up
- If you'd like this module to be available for open enrollment to everyone, select All Users
- Leave this field blank if you don't want this Module available for open enrollment.
- Go to Manage Module Assignments to learn how to assign specific Users to your Module
- When a Module is designated as open enrollment, a field will display allowing you to assign Users to a Group upon enrollment. In the Assign users to these groups upon enrollment section, select the preferred group(s) from the drop-down menu.
Automatic Enrollment (optional): Select which Groups are automatically enrolled in the Module. Select "All Users" from the pop-up to enroll everyone.
Advanced Settings
• Prerequisites Modules (optional): Select any Modules that need to be completed before starting this Module.
• Timed User Access: Provide each User a set amount of time to access the Module. The time for each User begins once they begin the Module. To learn more about Timed User Access, visit the Adding Timed User Access to a Module article
• Lock Module After Completion: Check if you would like to restrict access to the Module after the User completes it.
Group Assignments: Manage User access by selecting the Groups to be assigned to the Module.
Show User Enrollment: View a list of Users who can be assigned this Module on an individual per-user basis. If Groups were previously assigned (and saved) through the Group Assignments section, those Users will be checked and grayed out in the list. This signifies that the User is part of a Group. Please note that upon checking/unchecking the User from this list, the assignment is set/unset immediately. Note: Assigning Users through Groups is recommended.
CERTIFICATE AND CEU SETTINGS
Click on the Certificate & CEU tab (Fig. 6) to manage and modify the following settings.
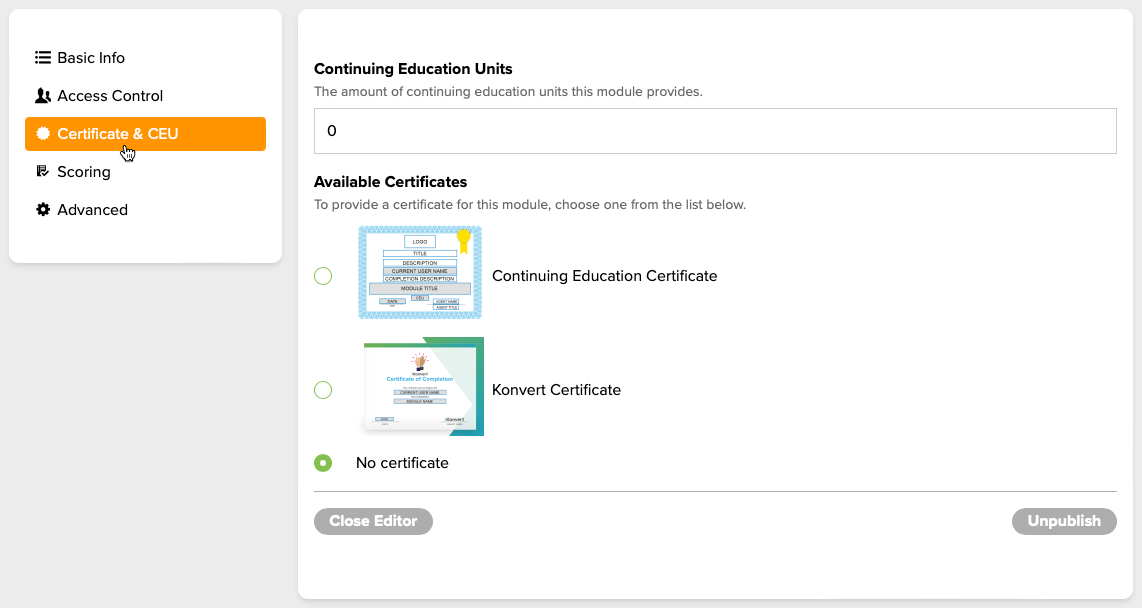
Continuing Education Units: Enter the amount of continuing education units this module provides. Note: The number of CEU units will display on the standard certificate template.
Available Certificates: If preferred, select from one of the available certificates. Users will receive the selected certificate once they complete the module. To learn more about creating certificates, view the Creating and Managing LMS Certificates article.
SCORING SETTINGS
Click on the Scoring tab (Fig. 7) to manage and modify the following settings.
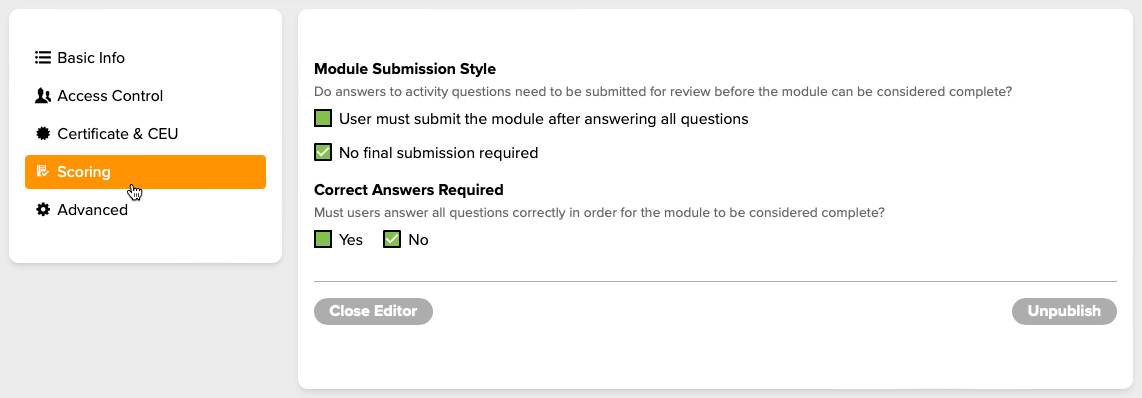
Module Submission Style: Select if the answers to the activity questions need to be submitted for review before the module can be considered complete.
- Select the User must submit the module after answering all questions checkbox if you want the user to submit the module after answering all questions.
- Select the No final submission required checkbox if you want to allow questions to be submitted as the user progresses through the module.
Correct Answers Required: Select if a user is required to answer all activity questions correctly in order for the module to be considered complete. Select Yes or No depending on preference.
ADVANCED SETTINGS
Click on the Advanced tab (Fig. 8) to manage and modify the following settings.
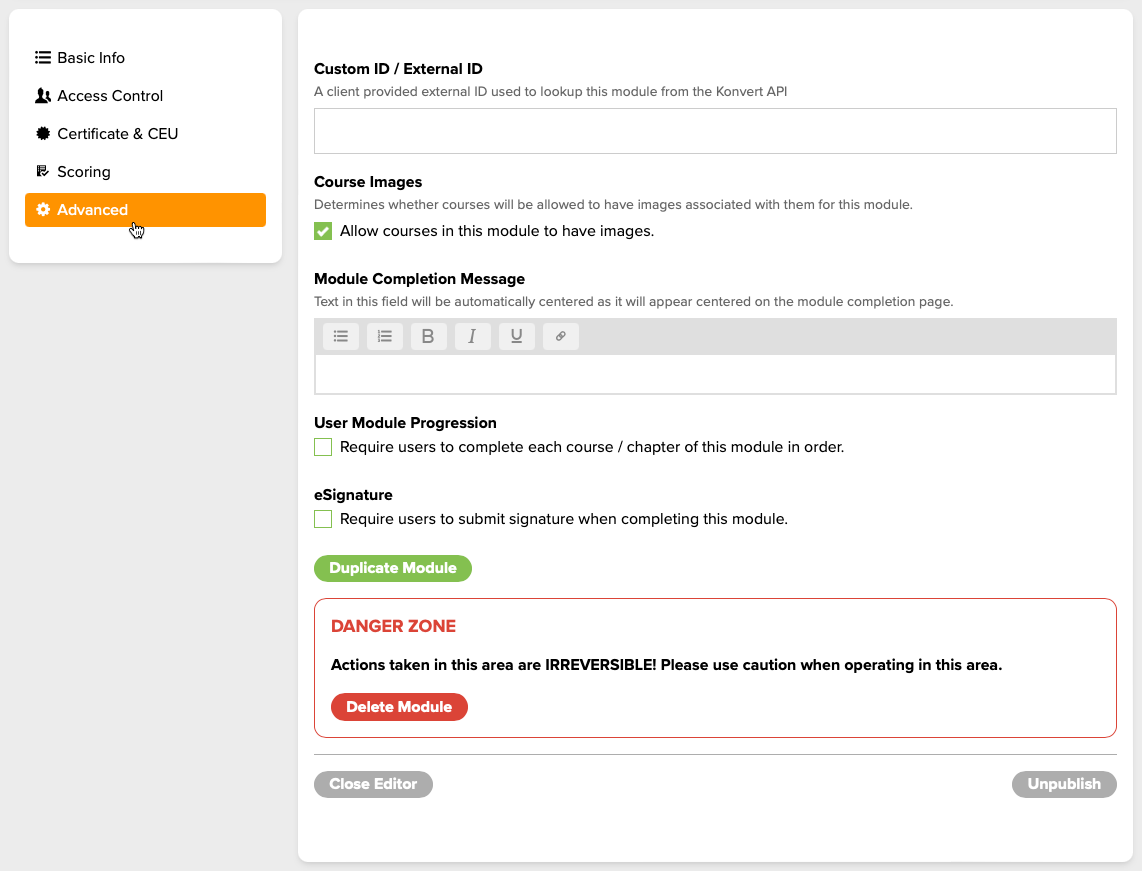
Custom ID / External ID: If preferred, enter a client-provided external ID that can be used to look up this module from the Konvert API.
Course Images: Select if you prefer courses in this module to have images. Similar to module images, course images are displayed when viewing your list of courses in card view. Course images are optional. If you would like to have course images, check the Allow courses in this module to have images checkbox.
Module Completion Message: Enter a custom completion message that will be displayed when users complete this module.
User Module Progression: Select if you would like to require users to complete each course/chapter of this module in order.
eSignature: Select if you would like to require users to submit an eSignature when completing this module. To learn more about the eSignature feature, visit the Enable an eSignature article.
Duplicate Module: Click the Duplicate Module button if you would like to duplicate this module along with the associated courses, chapters, activities and actions.
Delete Module: Click the Delete Module button if you would like to delete this module from the portal.
Note: Deleting a module is not reversible. Please use caution when deleting.