Adding and Managing Modules
The Konvert™ Learning Management System (LMS) is presented to users in modules. Modules are the highest level of organization – you might think of each module as a self-contained "school." Each module can be configured as a separate learning experience, though their structure may vary. Modules may contain Courses, Chapters, Activities and Actions.
In this article, we will explain:
- How to access the Portal Administration screen
- How to create a new module
- How to edit existing modules
- How to publish or unpublish a module
- How to delete a module
- How to duplicate a module
- How to reorder modules
ACCESS THE PORTAL ADMINISTRATION SCREEN
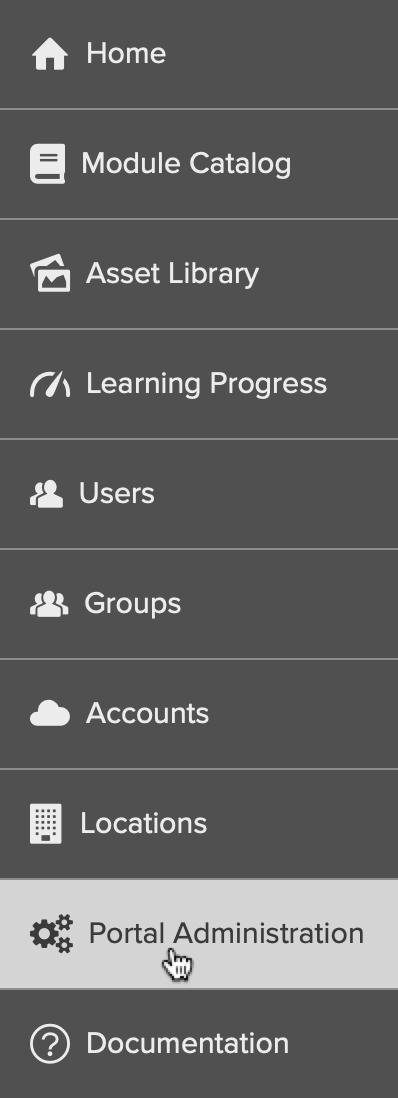
Modules can be created and managed through the Portal Administration screen. To access the Portal Administration screen, click the drop-down menu near the top-left corner of the screen and select the Portal Administration menu option (Fig. 1).
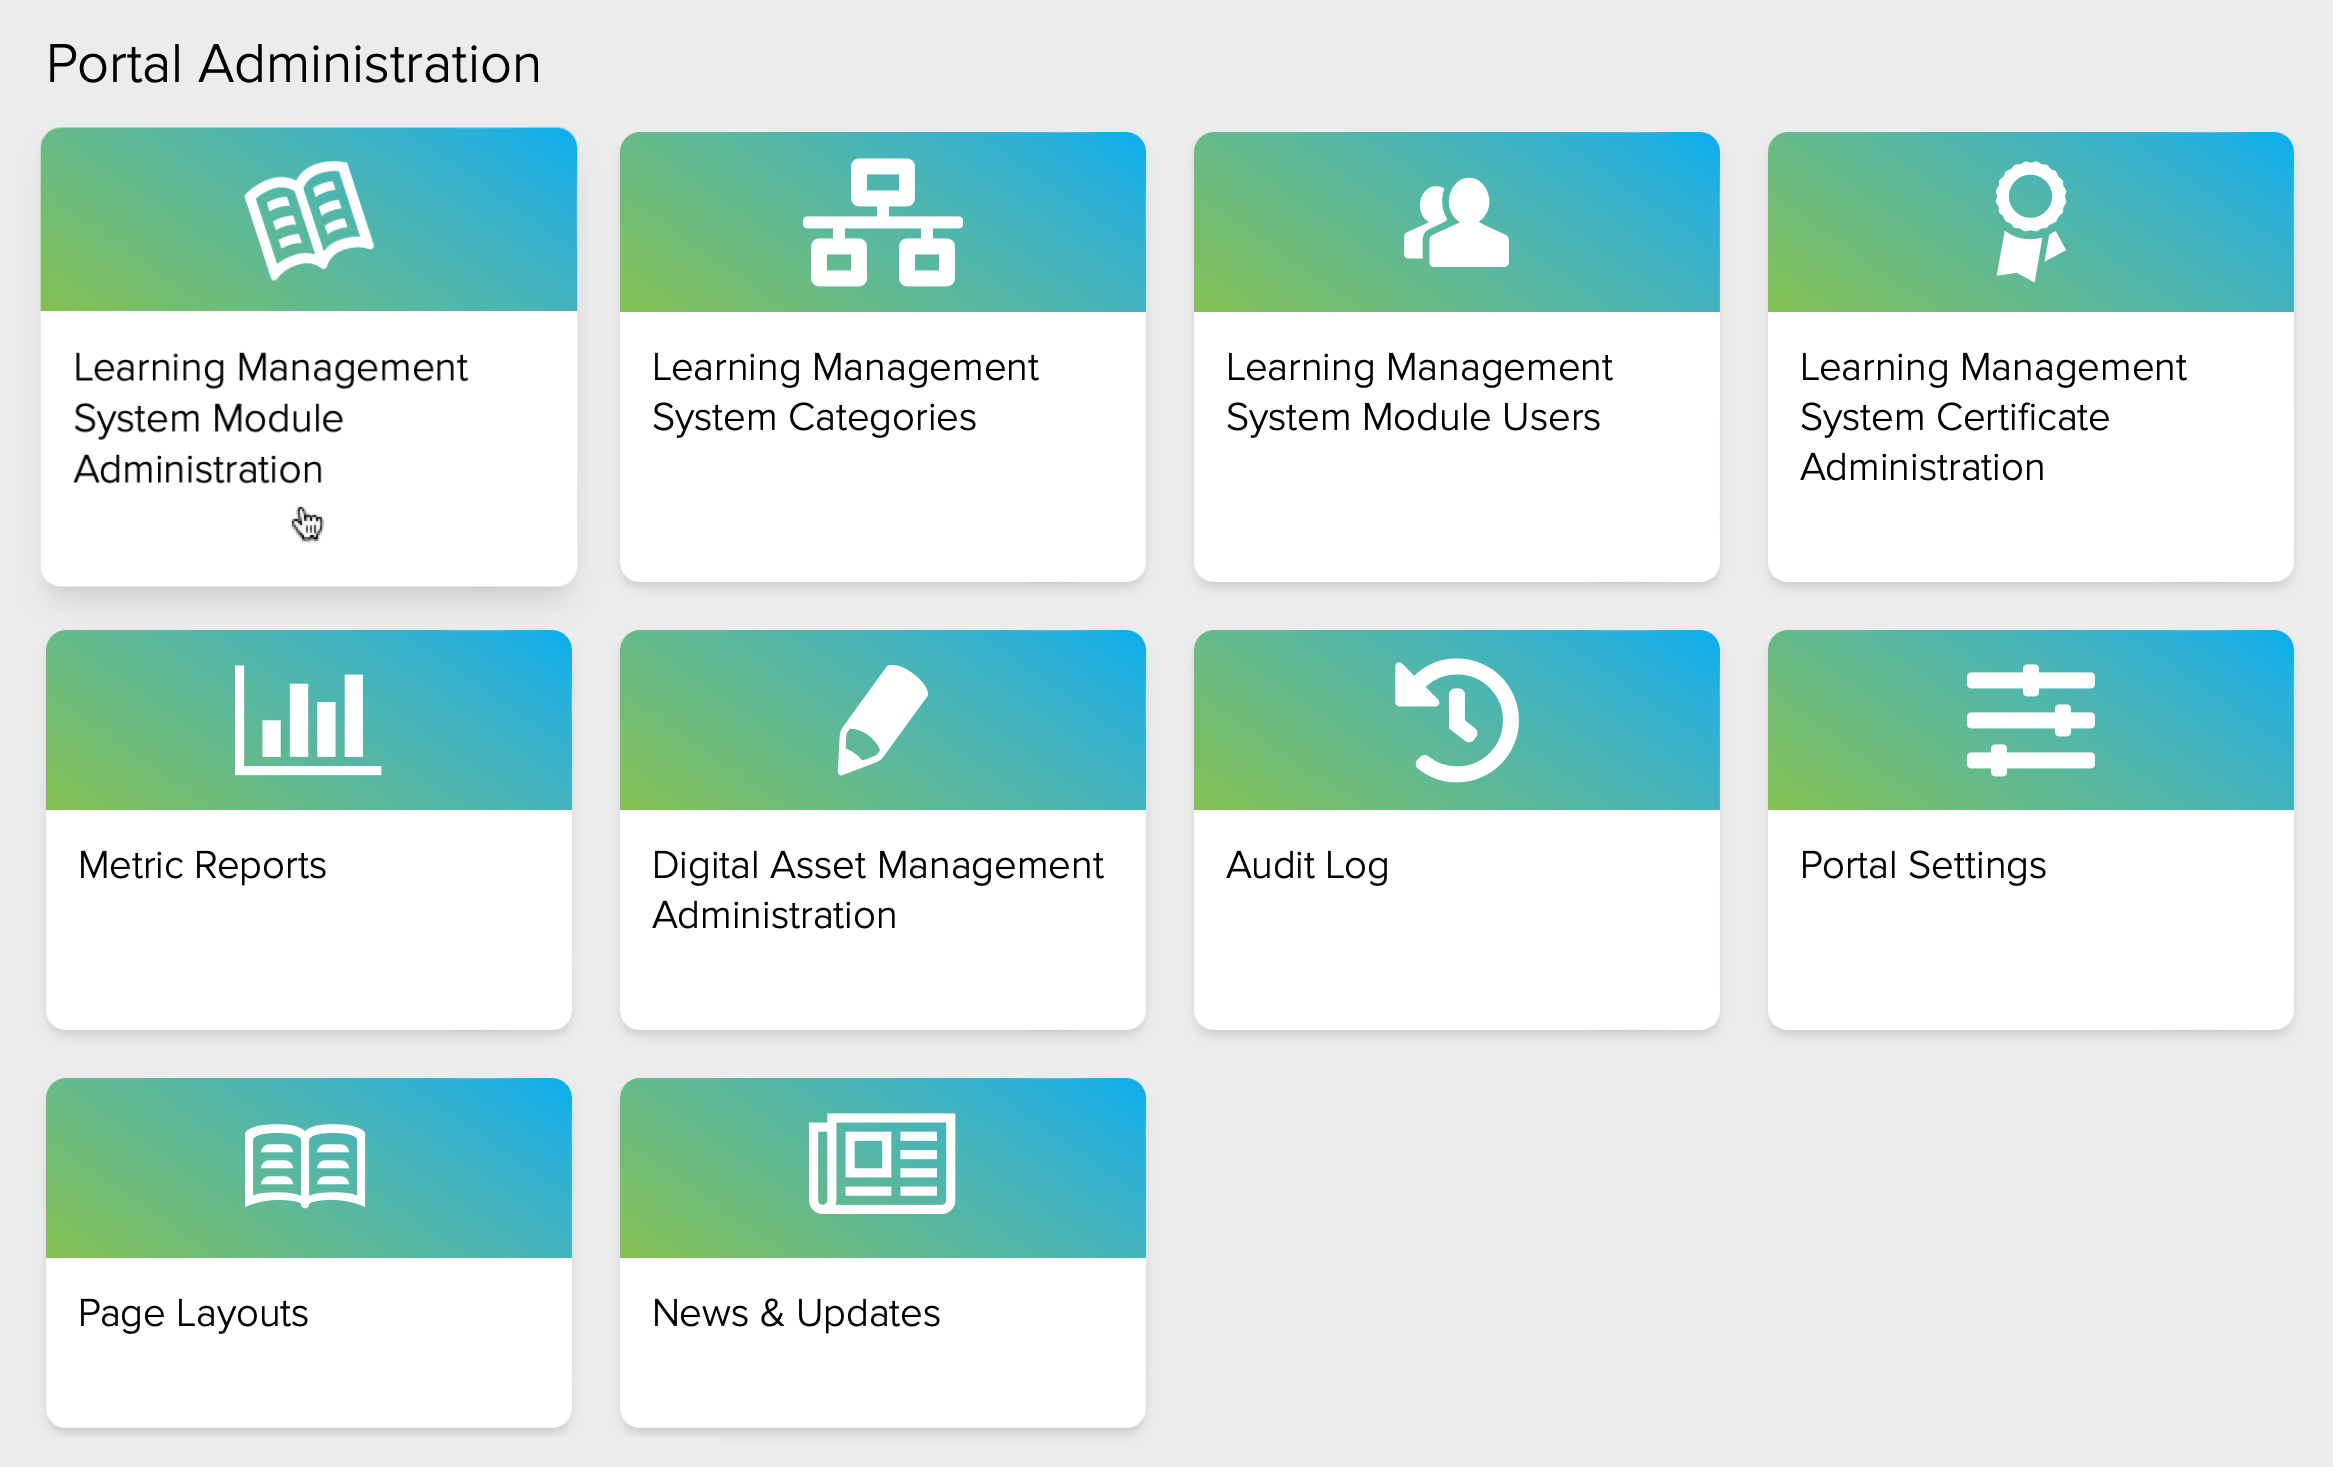
From the Portal Administration screen (Fig. 2), select the Learning Management System Module Administration card. From here you can create new modules, view and edit existing modules (both published and unpublished), and reorder modules.
CREATE A NEW MODULE
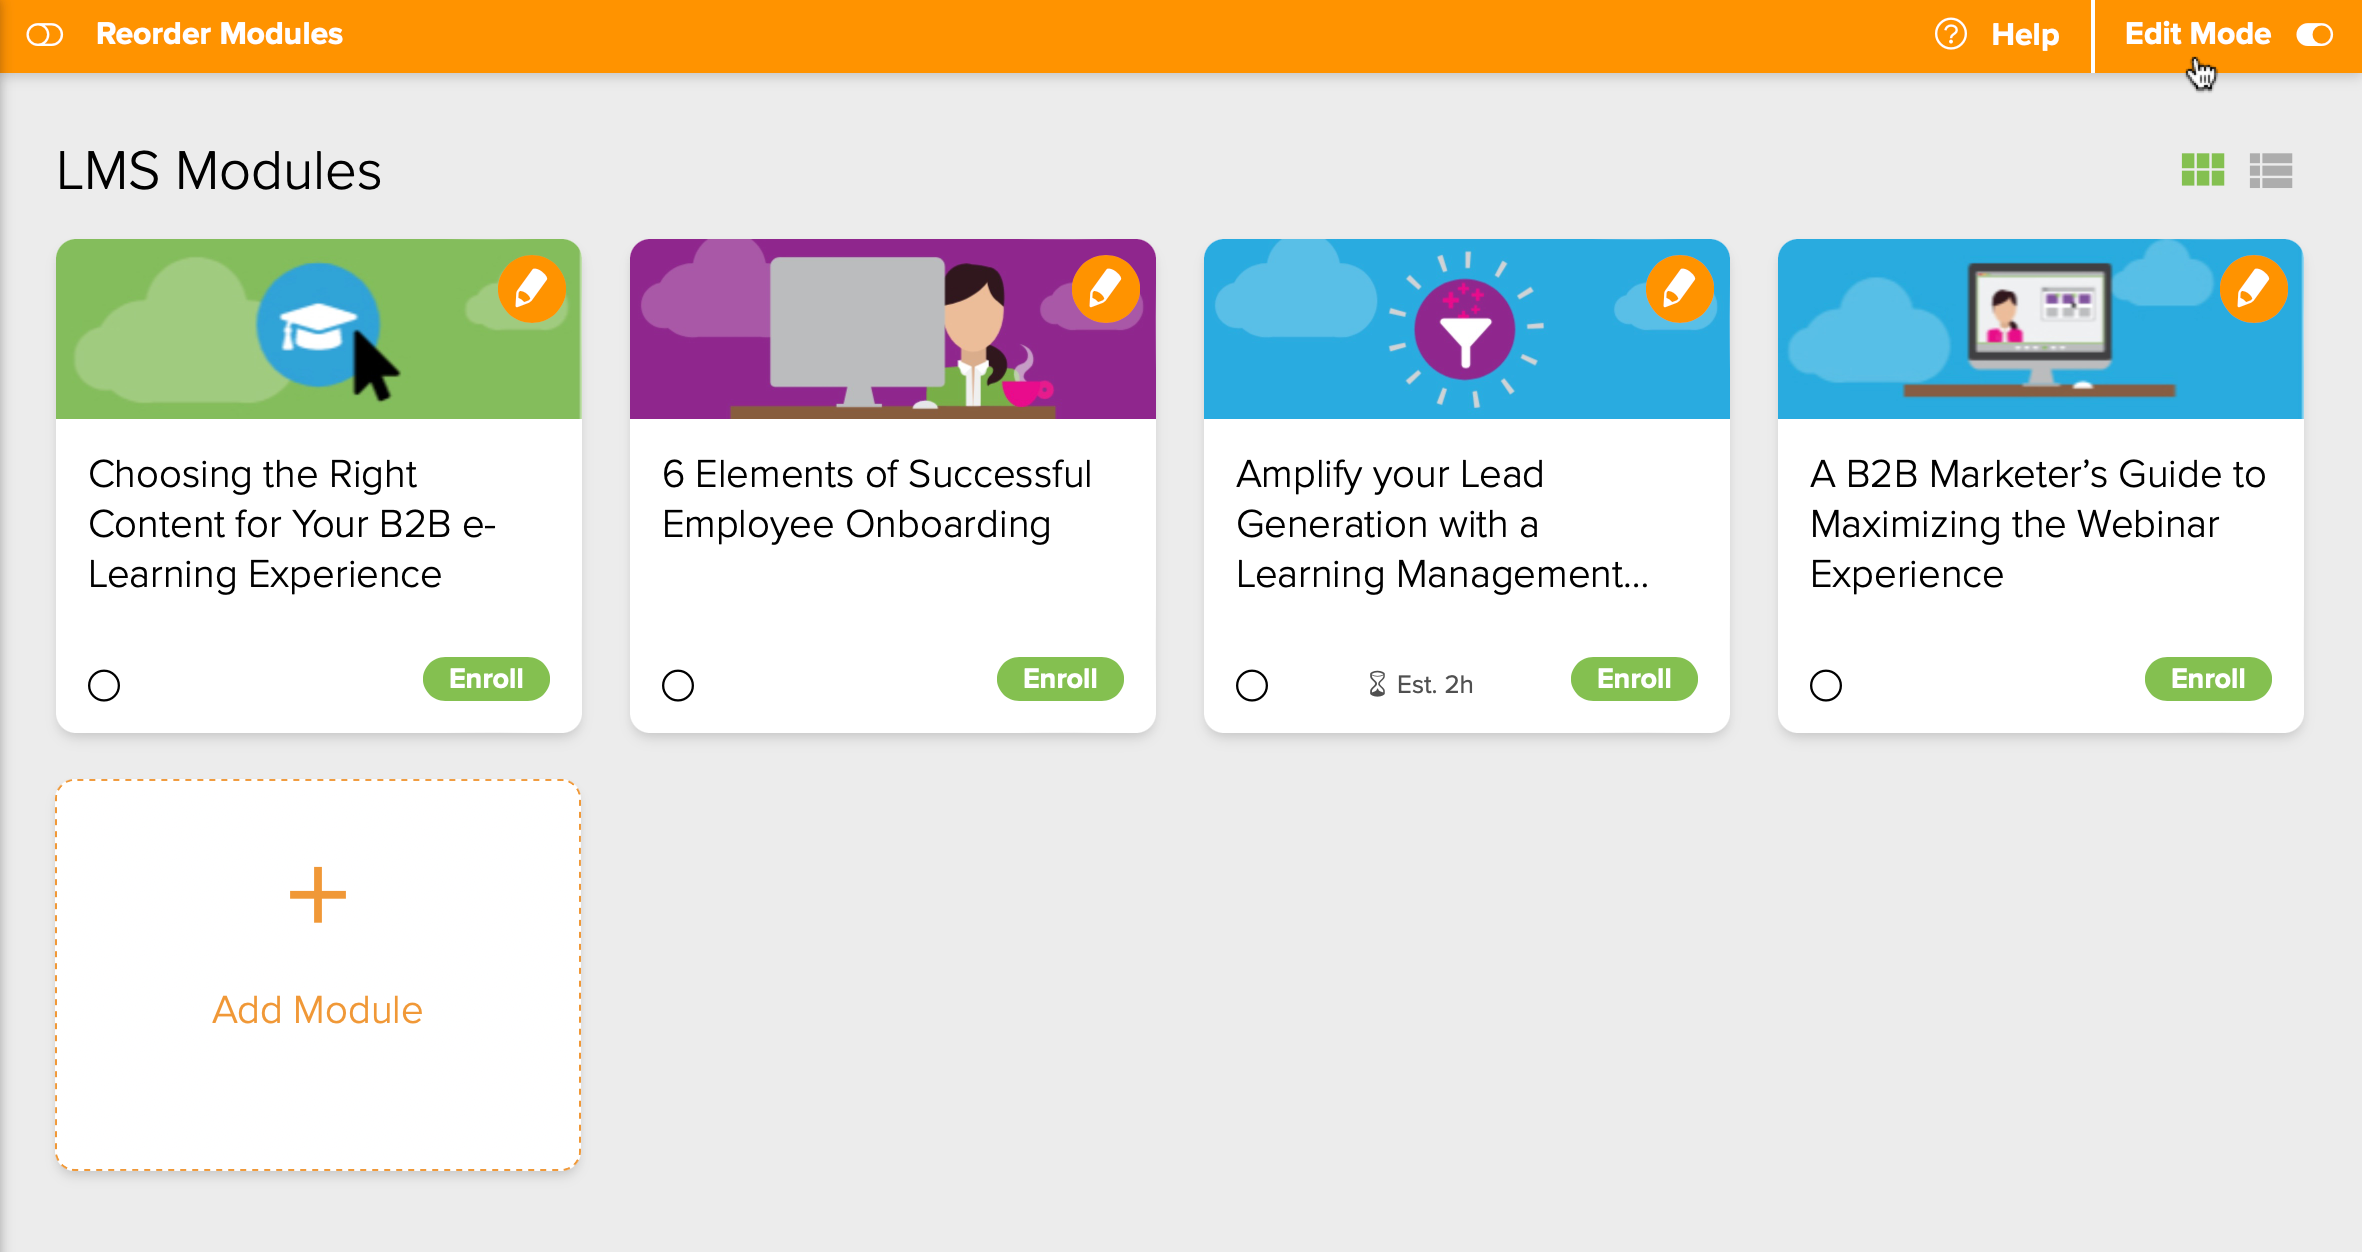
From the Learning Management System Module Administration screen, click on the Edit Mode toggle (Fig. 3) near the top-right corner of the screen if it is not already activated. Then, click the Add Module card to access the Add Module screen (Fig. 4).
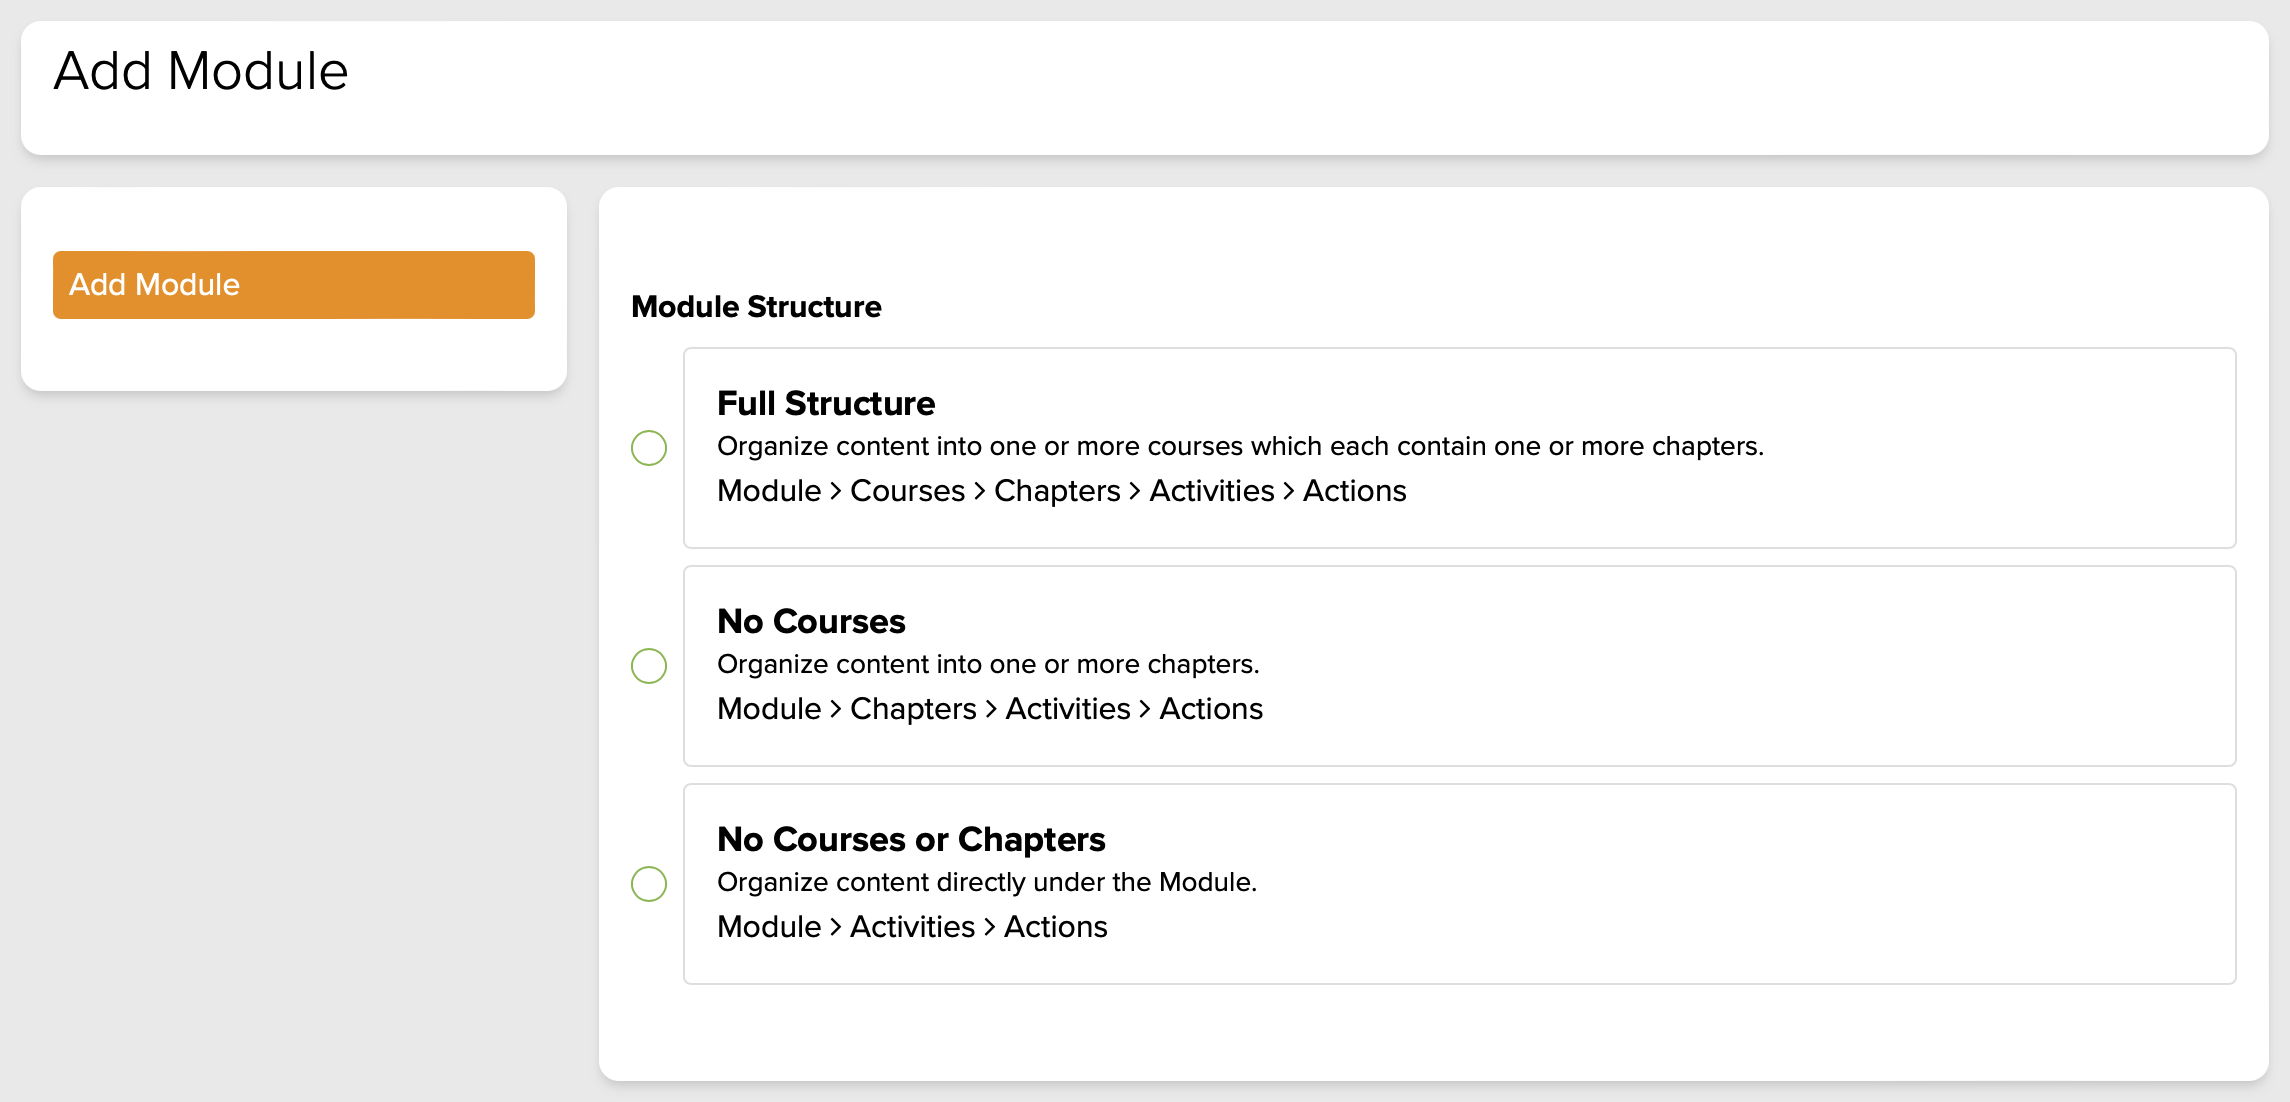
To begin, select which Module Structure you would like to use:
- Full Structure: Module > Courses > Chapters > Activities & Actions
- No Courses: Module > Chapters > Activities & Actions
- No Courses or Chapters: Module > Activities & Actions
To learn more about the Module Structure options, reference the Getting Started with Modules documentation.
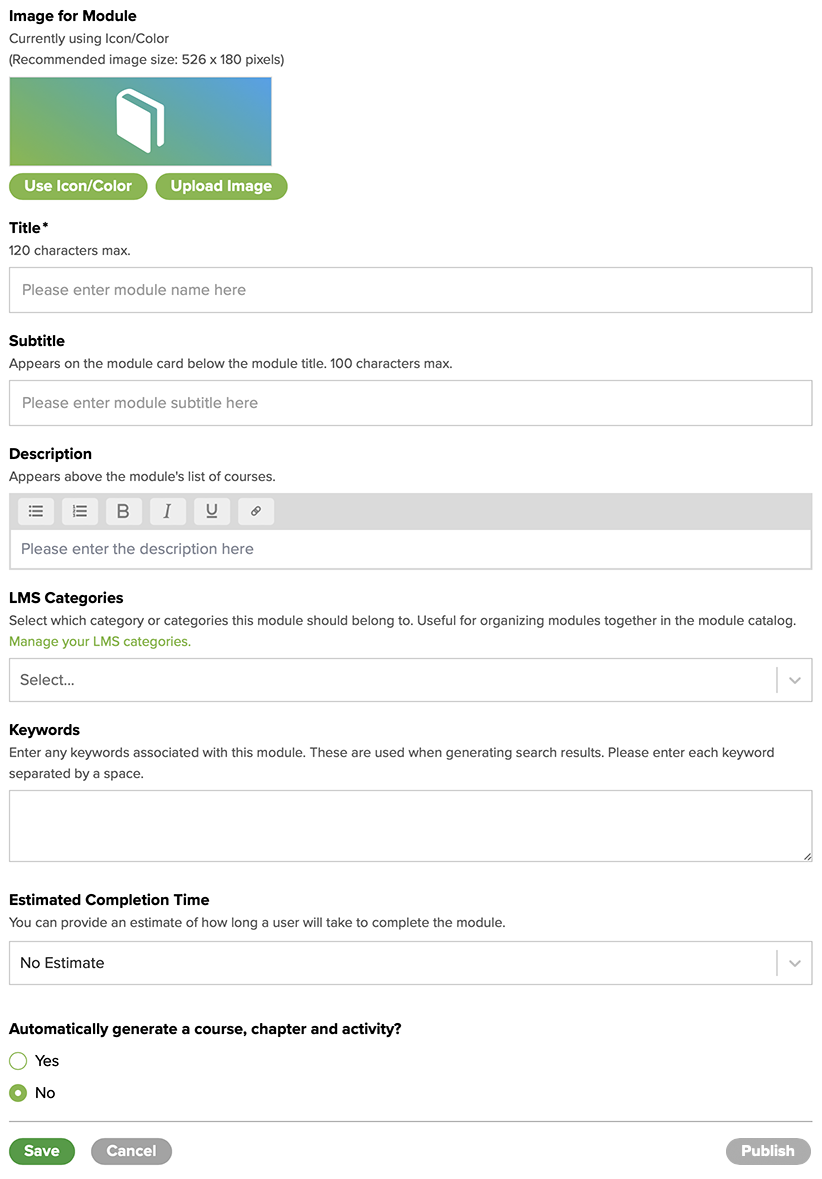
From the Add Module screen (Fig. 5), you can add:
- Module Image: Upload an image or use the icon with a solid or gradient background color.
- To use an icon with a solid or gradient background color, click the Use Icon/Color button. Select the background type (solid color or gradient), your color(s) and your icon. Click the Save button.
- To use an image, click the Upload Image button, then either drag and drop the image file into the space provided, or click the Add a File button and select the desired image.
- Preferred file types include JPEG and PNG.
- We recommend a minimum resolution of 526 pixels by 180 pixels.
- Upon uploading an image in the editor, you will be able to crop the image with the built-in cropping tool. Position your image so that it appears correctly in the provided space. When finished, click the OK button.
- Module Title: The module title appears on the module card. The character limit is 120 characters.
- Module Subtitle: The module subtitle appears on the module card below the module title when the user hovers on the card with a mouse or trackpad. The character limit is 100 characters.
- Module Description: The module description appears above the module's list of courses. Adding a description is optional. The description can include rich text, which allows for bulleted or numbered lists (just click on the appropriate icon above the text bar). You may also include bold, italic, underlined or linked text in the description.
- LMS Categories: Categories can help keep Modules organized within Module Catalogs.
- Keywords: Enter any Keywords that might help your users find Modules when searching. Keywords should be separated by a space.
- Estimated Completion Time: Help users decide if they have time to attempt to complete a Module by entering an Estimated Completion Time. Select Days, Hours or Minutes from the pop-up menu, then enter a numerical value in the field.
- You can also choose to automatically generate a Course, Chapter and/or Activity (depending on which Module Structure you selected previously). Click the Save button. Once saved, Access Control, Certificate and CEU, Scoring and Advanced settings will be available in the menu on the left side of the screen. For more information on these settings, visit the Module Settings documentation. Click the Close Editor button and your new module will appear as an unpublished module on the Learning Management System Module Administration screen.
Once the Module has been created, you can begin to populate the Courses, Chapters, Activities and Actions.
EDIT EXISTING MODULE SETTINGS AND CONTENT
If you would like to edit existing module settings, navigate to the Learning Management System Module Administration screen (Fig. 3, above) and click on the Edit Mode toggle near the top-right corner of the screen. Click the pencil icon near the top-right corner of the module you would like to edit to access the Edit Module screen (Fig. 5, above). For more information on these settings, see above or visit the Module Settings article.
PUBLISH OR UNPUBLISH A MODULE
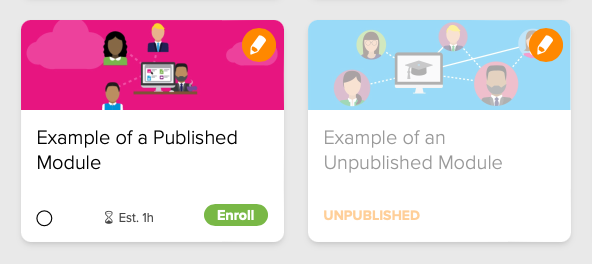
When a module is first created, it is unpublished and will appear somewhat faded compared to the other modules in the LMS Module Administration screen (Fig. 6). To publish a module, navigate to the Edit Module screen (Fig. 5, above) and click the Publish button towards the lower-right corner of the screen, then click the Publish button on the confirmation screen.
To unpublish a module, navigate to the Edit Module screen (Fig. 5, above) and click the Unpublish button towards the lower-right corner of the screen, then click the Unpublish button on the confirmation screen.
DELETE A MODULE
To delete a module, navigate to the Edit Module screen and click on the Advanced menu option (Fig. 7) towards the left side of the screen.
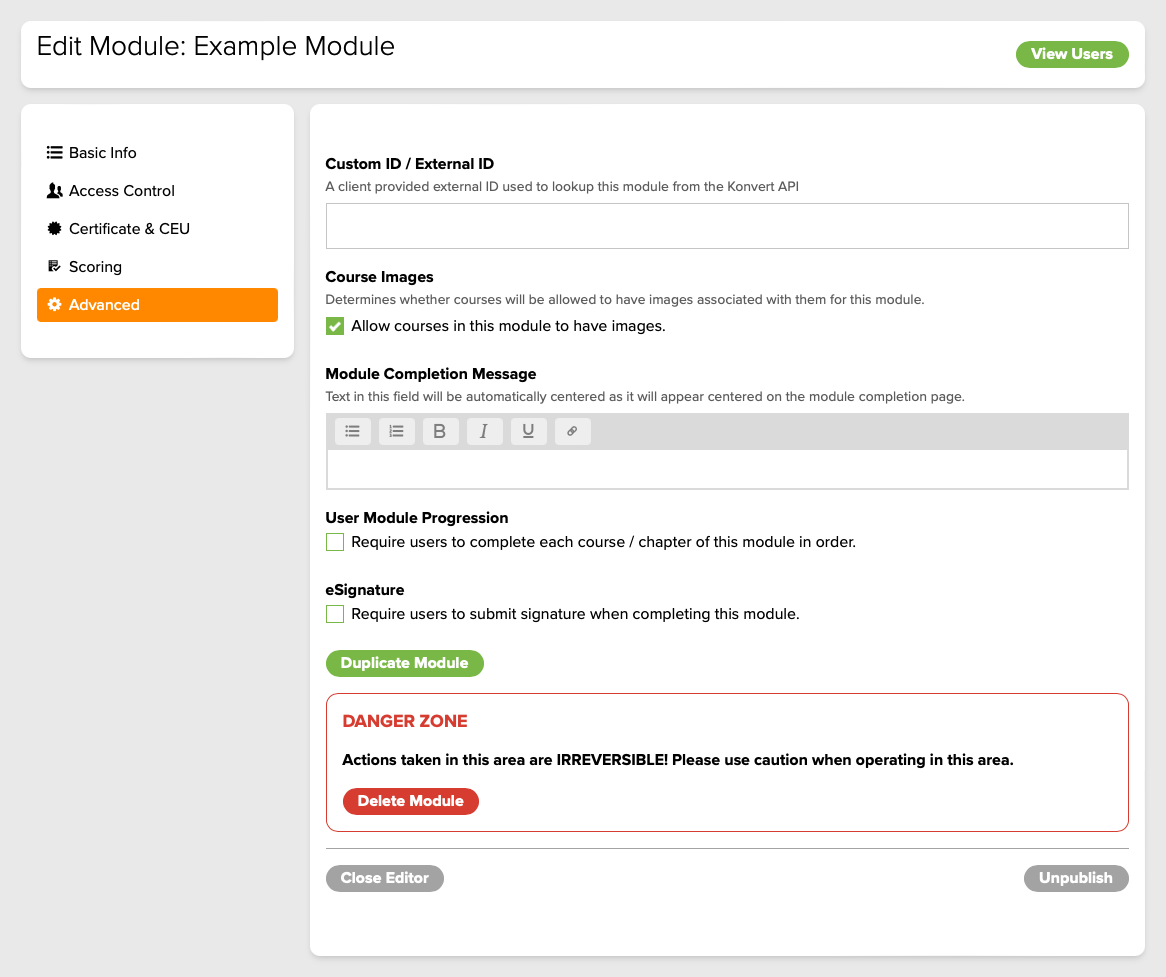
Click the red Delete Module button, type CONFIRM when prompted, then click the Delete Module button.
Note: Deleting a module is not reversible. Please use caution when deleting a module.
DUPLICATE A MODULE
To duplicate a module, navigate to the Edit Module screen and click on the Advanced menu option (Fig. 7, above) towards the left side of the screen, then click the green Duplicate Module button. The new module will be unpublished and available on the LMS Module Administration screen (Fig. 3, above) with the word Duplicated at the end of its title.
REORDER MODULES
To reorder modules, navigate to the LMS Module Administration screen (Fig. 3, above) and click the Reorder Modules toggle near the top-left corner of the screen. Drag and drop modules to change the order in which they appear. Click the Reorder Modules toggle again once you have finished reordering the modules.